background

Friday, October 7, 2011

ten projects - tanner's map


Project Three:: Day Five 
(that's getting confusing, huh?)
Giant Framed Map

HAPPY FRIDAY!

So I found this GIANT picture frame for $1.50 (what?) at a yard sale last Fall.  Not this Fall.  Last Fall.  So it's been collecting dust - along with lots of other crafty inspirations - in my garage for almost a year.  But this one...was NOT waiting for inspiration.  I knew exactly what I was going to use it for.


I wish I had some "before" pictures of the big map that was pinned to Tanner's wall.  The pins would fall out, and one corner would hang down.  Plus - all the holes in the wall?  Had to go.  And this frame was exactly the right size - YAY!  

So it got a few coats of black spray paint and a little too much distressing.

Then it was ready for the map.  I had the map laminated at a local teaching supply store (5 bucks!).  If you're taking on a project like this, I would HIGHLY recommend the laminating.  This map would likely have ripped apart if I'd tried to do it without laminate.


Anywhoo...first I taped the map to the back of the frame.  This allowed me to make sure that it was centered correctly without having to re-staple if it was off-kilter.  Also it allows you to get a nice tight fit and work out any wrinkles (literally) before you staple.  Then I reinforced around the edges with my staple gun.  Added a wire for hanging.


And voila!  


It looks good, and it's built to last.  Until Tanner decides he's sick of maps and globes and moves on to the next thing.


So what have you been up to?


~~~~~~~~~~~~~~~~~


Come play with me...

I link up to the parties shown on the right side of this here blog - under Linky Love.  Check them out...they're the greatest! :}

Wednesday, October 5, 2011

ten projects in twenty days - dry erase board


Project Two :: Day Three
Custom Dry Erase Board

So.  I saw this dry erase board by Jen at A Thousand Words and I knew I had to try it.   


Which I did.  But Jen's version is way way way cuter.  
Still.  My version lives in my house with me so I love it. :)


I swear I took "before" and "during" pics, but I just can't find them.  So you'll just have to take my word for it.  I had a hand-me-down print from my in-laws which just happened to be 12 inches wide (scrapbook paper width).  Painted it white.  Used 8 strips of scrapbook paper.  The strip on the top is slightly taller than the rest.  Also, I used thin (like 1/3-inch) strips of white paper to create the stripes between the sections.  Jen had this on her version - not sure how she did it, but I wanted to recreate it.  Glued them all to the cardboard backer that came with the frame, reassembled, and that was it.


Couple of things.  I don't recommend using darker paper, as your dry erase marker will not show up in front of it.  Also?  I know that it's not spelled "margarita."  Or maybe it is.  You don't know.  Maybe I'm tossing my pasta with a margarita.  Which would actually be pretty disgusting.


Today it does not list the fake menu that was on it when I took these photos.    Now it has the list of my Ten Projects in Twenty Days projects, and looks very messy and very disorganized.  Still love it though.  I love that you can use any frame and any paper and make one of these.  So easy!


~~~~~~~~~~~~~~~~


There are so many amazing projects like this out there.
Here's some inspiration:


So what have you been creating?

~~~~~~~~~~~~~~~~~


Come play with me...

I link up to the parties shown on the right side of this here blog - under Linky Love.  Check them out...they're the greatest! :}


This post is linked up here...


French Country Cottage
Chic on a Shoestring
Finding Fabulous
Fingerprints on the Fridge
The ArtsyGirl Connection
JAQS Studio
My Lil Pumpkin Patch
The Brambleberry Cottage
Somewhat Simple
Tales from Bloggeritaville
Yesterday on Tuesday

Monday, October 3, 2011

ten projects in twenty days...blue jars


OK...Here we go:


Welcome to Ten Projects in Twenty Days!


I concocted "Ten Projects in Twenty Day" in order to force myself to wrap up some projects that I've already started, and to get cooking on some craft ideas that have been rattling around in my head.  I can't tell you how nervous I am about this.  10 projects in 20 days is a big commitment for me.  But without further ado...

Project One :: Day One
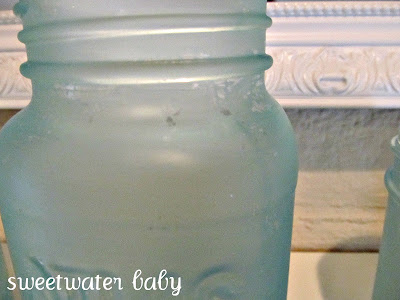
Blue Mason Jars

Now, I know lots of these have been floating around in the blog world.  And for good reason!  This is an easy and inexpensive way to use jars you might otherwise throw away to make beautiful, functional vases, pencil jars, or whatever.

My recipe came from The Single Nester

She tested several ratios of glue to food coloring, but I chose to make it simple with just one recipe:


1 Tablespoon white glue

1 teaspoon water
(Start with just a few drops and add a little as necessary.  Too much water will make your glue/paint "sheet."  You'll see some of this problem in the photos below.)

1 drop blue food coloring
(Don't you love how the shape of the little food coloring containers hasn't changed in, like 40 years?  Not that I would know, since I'm only 29.)


Start by mixing the glue and food coloring.  Add maybe a 1/4 tsp of water.  If you're happy with the consistency, start painting!  If it's still a little too thick to paint with, add another 1/4 tsp of water.  


I decided ahead of time that I wanted to paint the outside of the jars so that I could use them as vases.  If you paint the inside, the water will melt your glue/food coloring concoction.  No bueno.


Paint your jars upside down on wax paper.  You don't really need to paint the very top of the lip of the jar anyway.  And this is glue, after all - you want to make sure that you're painting on a surface that can be easily separated from the glue.  Wax paper does the trick.


If your glue mixture starts to "sheet" {like in the photo below} let it dry for about 30 seconds and then go over it again with your brush.  Don't add more glue at this point - just use your brush to smooth over the unpainted area.  It might not be perfect, but it still looks good when it dries.  Also, add a little more glue to your glue mixture before painting another jar.  


And here's the finished product:


Nice, huh?  If you do this project, send me some pictures!

UPDATE:  If you make these, I really recommend spraying them with clear spray paint as a final step.  You can use a matte finish if you want to keep that frosty look.

~~~~~~~~~~~~~~~~~


Come play with me...

I link up to the parties shown on the right side of this here blog - under Linky Love.  Check them out...they're the greatest! :}

This post is linked at


French Country Cottage
Chic on a Shoestring
Finding Fabulous
Fingerprints on the Fridge
The ArtsyGirl Connection
JAQS Studio
My Lil Pumpkin Patch
Clean and Scentsible
DIY by Design
Handy Man Crafty Woman
Savvy Southern Style
Ginger Snap Crafts
Domestically Speaking
Coastal Charm
Between Naps on the Porch
Tip Junkie
Sumo's Sweet Stuff
Giggles Glitz and Glam
Hope Studios
I'm Topsy Turvy

Thursday, September 29, 2011

thrifty thursday...

O.M.G. 

Look what i found at a yard sale right down the street from my house on Saturday!  I saw this cute scrolly frame peeking out from under a pile of stuff and thought "great...I'll paint it and make it into a cute little chalkboard." 


So I pulled it out from under the stack and this is what I saw:


I.love.this.painting.  By a Michigan artist named Emily Wolf.  I Googled her, but didn't really find anything.  There's an Etsy artist named Emily Wolf, but I'm pretty sure it's not the same person.  If you're Emily Wolf from Michigan, drop me a line so that I can tell you how awesome you are.  Anywhooo...treasure found!  Love love love it!


What treasures have you found lately?

~~~~~~~~~~~~~~~~~

Come play with me...

I link up to the parties shown on the
right side of this here blog - under Linky Love.
Check them out...they're the greatest!  :}

This post is linked at
Coastal Charm
Common Ground
Fireflies and Jellybeans
French Country Cottage
The Shabby Nest
Creating a House of Grace

Wednesday, September 21, 2011

what i wore wednesday :)


Hi there...it's What I Wore Wednesday again!

I read that a lot of people do WIWW to stay accountable...to make sure that they get out of their sweats at least once a week. Well...I'm a working mom, so I'm getting dressed every day. But...gotta say: I can always use a second look in the mirror before I walk out the door. It's funny how I have outfits that I love - and I think they look pretty cute - until I see a picture of myself in them and think "WHOA Nelly! That looks pretty bad!" or "I wonder if people think I'm pregnant in this outfit?"

So here's what I got this week.

I pray you don't think, "WHOA Nelly!"


Outfit on the left: Casual Friday...Floral tank from Old Navy, Target cami underneath, thrifted jeans (Levi's, I think), and yellow patent flip flops from DSW.

Center: Client presentations...Jones New York no-iron blouse, Ann Taylor pants, Marc Fisher orange patent wedges (yeah baby!)

Right: Semi-casual Thursday...Old Navy chambray peasant blouse (my new favorite), J Crew pants and flip flops.

And everyone? Have a great week!

Linking up at The Pleated Poppy


~~~~~~~~~~~~~~~~~~~~~~~~~~~~~~~~~

STAY TUNED FOR 10 PROJECTS IN 10 DAYS...COMING SOON!

Friday, September 16, 2011

Wednesday, September 14, 2011

yum...

Rustic No-Knead Bread

Ok...first off?  I have to say.  I fiddled with this photo on Picnik.  And I thought it looked really cool.  And I uploaded to my blog post.  But now that I look at it here, it looks really weird.  Like, really bright.  This bread is not this bright in person.  It's just kind of regular delicious bread-color.  So keep that in mind.  But this recipe?  LOVE IT!  So easy.  You'll never eat store-bought bread again!  Bon apetit!

3 cups self-rising flour
1/2 tsp instant yeast
1 1/2 cups warm (but not hot) water
Put the flour and yeast together in a medium-sized bowl.  No need to stir them together, but make sure the yeast is on top.  You want the warm water to touch the yeast and get it going.

Add water and mix until you have a nice ball of dough. It shouldn't be too moist.  It should just be enough water to get the flour to form into a ball.  You may need to add a little additional water at this step (by the tablespoonful). Cover with plastic for about 20 hours (we usually have this for dinner, and I prep it the night before).

An hour or two before you want to bake your bread, turn your ball of dough onto a floured cutting board and shape into a ball. Even though this is a no-knead recipe, I sometimes give it a little knead at this point.  But it's totally not necessary.  I'm just a weirdo. 

Place in an oiled bowl and cover with a dish towel. When the dough is ready to bake, preheat your empty dutch oven at 450 degrees for 30 minutes. This sounds odd, but you want your dutch oven to be really hot when you put your dough in.  Plop your dough directly into the middle of your dutch oven (careful...it's going to be really hot), cover and bake for 30 minutes. Remove the the lid and place back in the oven to bake for an additional 15 minutes. 

When you take off the lid, but before you put it back into the oven for the final bake-time, you can brush your bread with melted butter, rosemary and kosher salt...YUM!  Or maybe some asiago cheese?  Or some crushed garlic?  Create your own recipe...go crazy!  The more you bake with this recipe, the more comfortable you'll get with it, and the more ideas you'll have for creating your own delicious bread.

Have fun!


YUM!

~~~~~~~~~~~~~~~~~~~~~~~~~~~~~

Linking up here...

Mad in Crafts
Remodelholic Recipe Swap
Brambleberry Cottage
Fireflies and Jellybeans