OK...Here we go:
Welcome to Ten Projects in Twenty Days!
Welcome to Ten Projects in Twenty Days!
I concocted "Ten Projects in Twenty Day" in order to force myself to wrap up some projects that I've already started, and to get cooking on some craft ideas that have been rattling around in my head. I can't tell you how nervous I am about this. 10 projects in 20 days is a big commitment for me. But without further ado...
Project One :: Day One
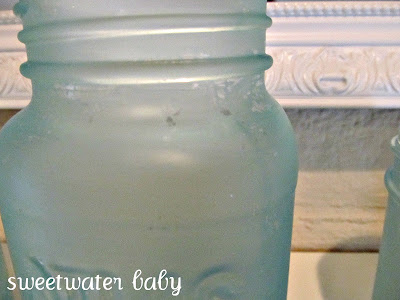
Blue Mason Jars
Now, I know lots of these have been floating around in the blog world. And for good reason! This is an easy and inexpensive way to use jars you might otherwise throw away to make beautiful, functional vases, pencil jars, or whatever.
My recipe came from The Single Nester.
She tested several ratios of glue to food coloring, but I chose to make it simple with just one recipe:
1 Tablespoon white glue
1 teaspoon water
(Start with just a few drops and add a little as necessary. Too much water will make your glue/paint "sheet." You'll see some of this problem in the photos below.)
1 drop blue food coloring
(Don't you love how the shape of the little food coloring containers hasn't changed in, like 40 years? Not that I would know, since I'm only 29.)
Start by mixing the glue and food coloring. Add maybe a 1/4 tsp of water. If you're happy with the consistency, start painting! If it's still a little too thick to paint with, add another 1/4 tsp of water.
I decided ahead of time that I wanted to paint the outside of the jars so that I could use them as vases. If you paint the inside, the water will melt your glue/food coloring concoction. No bueno.
Paint your jars upside down on wax paper. You don't really need to paint the very top of the lip of the jar anyway. And this is glue, after all - you want to make sure that you're painting on a surface that can be easily separated from the glue. Wax paper does the trick.
If your glue mixture starts to "sheet" {like in the photo below} let it dry for about 30 seconds and then go over it again with your brush. Don't add more glue at this point - just use your brush to smooth over the unpainted area. It might not be perfect, but it still looks good when it dries. Also, add a little more glue to your glue mixture before painting another jar.
And here's the finished product:
Nice, huh? If you do this project, send me some pictures!
UPDATE: If you make these, I really recommend spraying them with clear spray paint as a final step. You can use a matte finish if you want to keep that frosty look.
~~~~~~~~~~~~~~~~~
Come play with me...
I link up to the parties shown on the right side of this here blog - under Linky Love. Check them out...they're the greatest! :}
This post is linked at
French Country Cottage
Chic on a Shoestring
Finding Fabulous
Fingerprints on the Fridge
The ArtsyGirl Connection
JAQS Studio
My Lil Pumpkin Patch
Clean and Scentsible
DIY by Design
Handy Man Crafty Woman
Savvy Southern Style
Ginger Snap Crafts
Domestically Speaking
Coastal Charm
Between Naps on the Porch
Tip Junkie
Sumo's Sweet Stuff
Giggles Glitz and Glam
Hope Studios
I'm Topsy Turvy


14 comments:
You did a fantastic job! Thank you so much for mentioning my project.
Very pretty, I love the finished product! I am visiting from Giggles, Glitz and Glam and I am a new follower!
Hope you are having a good week!
Michelle
www.delicateconstruction.blogspot.com
They look kind of frosty, very cool!
So cool. I may have to try since I see these ball jars at thrift stores for super cheap.
THANK YOU! I've seen these over and over again but didn't know how to do it! GREAT Tutorial! Thanks for linking to Wicked Awesome Wednesday.
Oohh! They turned out beautifully! Thanks for sharing!
Thats really pretty--has a frosted look. Thanks for sharing!
love that color of blue I am thinking christmas white lites in it and making a beautiful glow come see me at http://shopannies.blogspot.com
I love this idea- so creative and charming!! Sharing these on FB- thanks for sharing at Feathered Nest Friday!
Lovley job :)
and do not miss......
S
A
T
U
R
D
A
Y
S
H
O
W
O
F
F
It´s fun :)
WELCOME :)
Håkan ( The Roseman)
Lovley job :)
and do not miss......
S
A
T
U
R
D
A
Y
S
H
O
W
O
F
F
It´s fun :)
WELCOME :)
Håkan ( The Roseman)
I love these - the matte finish is just gorgeous and gives them a totally different look from most of the other colored mason jars I've seen out there. I really want to try this! And I'm your newest follower - can't wait to explore more of your blog! : )
-Mel the Crafty Scientist
I have been wanting to make these! They are so pretty! Thanks for linking up to the Stache Party!
How long do they take to dry??
Post a Comment